Monday, June 30, 2014

Birthday Balloons

Ever since I purchased the Balloon Dies from Simon Says Stamp, I have been wanting to use the big balloons on a card. I used the smaller balloon on a card in the beginning of this month- Tons of Fun . Today I decided to use the 2nd biggest balloon... I wasn't sure after die cutting it, but I had to step out of my comfort zone and use it.... so I did!!


Not only did I use it.... I let it off the edge and snipped off the extra bits!!! End result... I love it. I decided to use some colorful balloons. Clear embossed some stars on the red and yellow balloons. 


I also white embossed the sentiment on the blue balloon and used some White-Blue twine to make the strings. 

The red and yellow balloon are popped up and so is the sentiment at the bottom. The sentiment is from Lawn Fawn's Year Three set. As finishing touch I added some black dash lines on the edges. If I redid this card, then I would use white pen and also edge the balloons. But I thought of that after I finished the black lines. 

In the end, it is cute and cheerful. 

Until next time,

Happy Krafting,

Cheers =)
Birthday Block Card

Every morning, on weekends and holidays, I eat breakfast with my computer.... some coffee and some crafting videos..... while I was doing the same yesterday morning, I came across Block Card Video by Deb Valder.... a super cute card....a different shape.... and many different decor possibilities. There was another similar video and a third one....made me think...is this new style or am I just getting it to it late....either ways, I loved it and had to try it. 


ADORABLE!!!! The final card size is 4-1/2" x 6" so a little bigger than normal card size ( 4-1/4" x 5-1/2") so you could make a matching envelope or just find bigger size envelopes. However, this is super simple to make. The tough part is thinking about how to decorate it ;) 


You could decorate front, top and back or just front and top..... either ways.... it looks cute.... and surely will bring smile to the receiver's face. Deb Valder has a perfect tutorial explaining how to make this card (I loved how she explained it compared to the other 2 videos).  Click HERE for the tutorial.


For this project, I used Vanilla base, and layered it with Espresso Cardstock and Everyday Enchantment Pattern Paper (All paper from Stampin' Up!). The stamps are from following sets: Ciao, Baby!,  A Fitting Occasion and Create A Cupcake (All by Stampin' Up! and now retired) and used the coordinating punches. I decided to add some sparkle...so I did some gold embossing on the cupcake holder and added some blue rhinestones for sprinkles on the icing!

I enjoyed making it... and intend to make more for other occasions :D and give it better finishing touches then this ;)

Until next time,

Happy Krafting,

Cheers =)

Saturday, June 28, 2014

Birthday 2 U

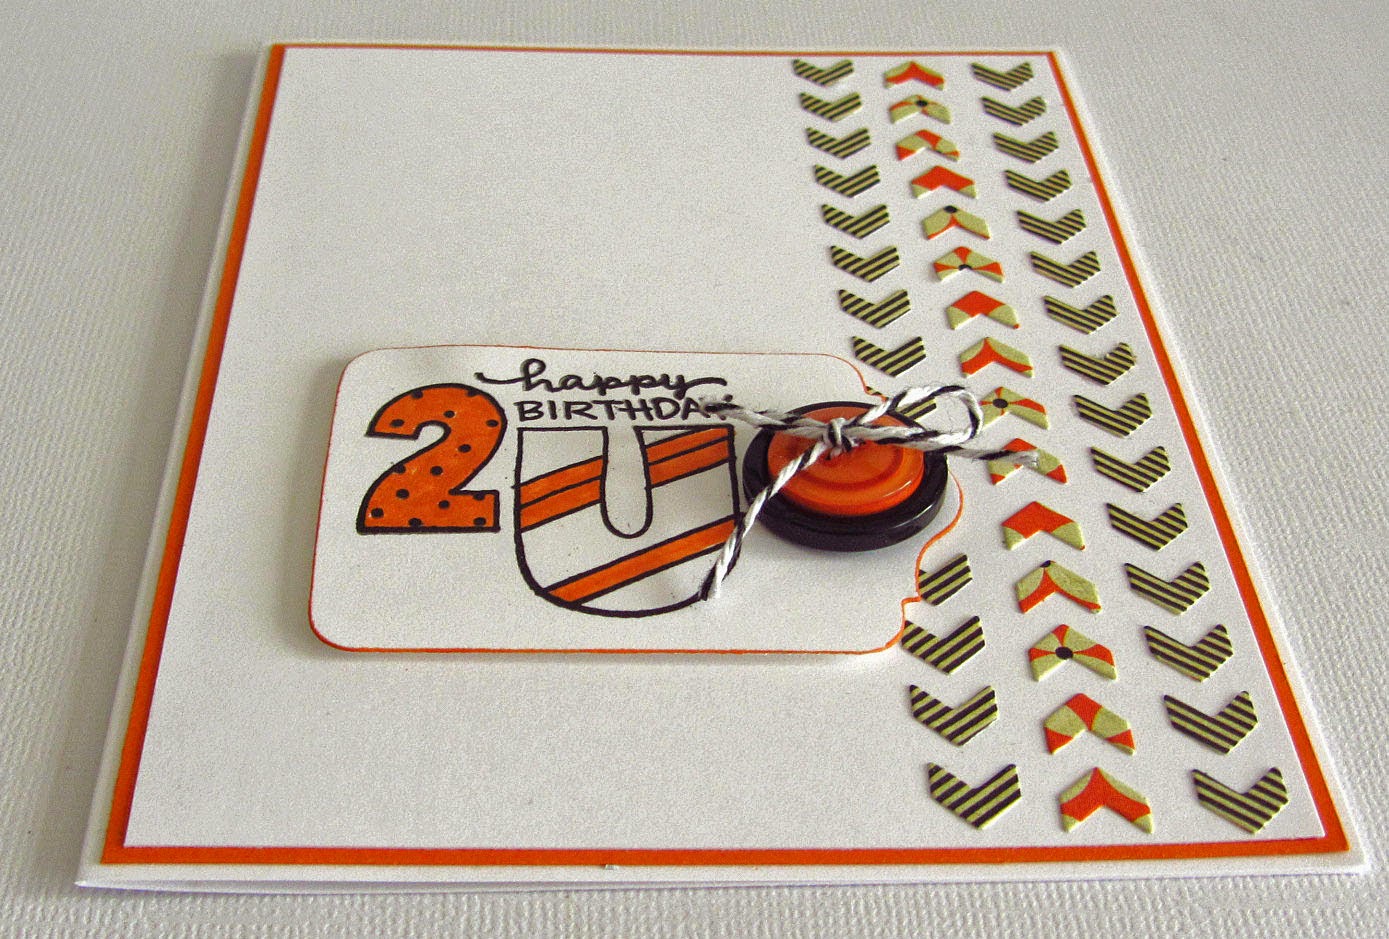
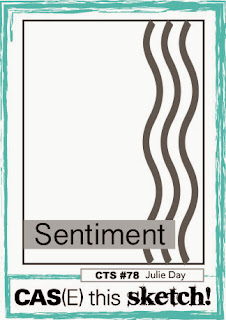
My card today is made using CAS(E) This Sketch's Sketch Challenge #78 . I had copied the sketch in my card sketch book the week challenge started, but never got around to making it. Then I finally did make it last week...and got around posting it today. 

The sketch is simple....


What really attracted me was the 3 lines on right hand side...... you could do anything with it... ribbons, stamp, die cut, watercolor, stencil..... your brains go racing...don't they? That is why it took me forever to decide what I should do.... finally I settled on some arrow die cutting.


These tiny arrow points are part of die by Lawn Fawn called Stitched Journaling Card - It has a stitched journaling card and has star, arrow, banner and heart dies. The shape dies are like a line of 6 of the same shape... so you could cut out 6 shapes out at the same time or use the negative. I created strips of paper with arrow holes (best I could think of to describe)... but did not like how it looked. so ended up using the negative as stencil to fill in the arrows. 


I used 2 different pattern papers to create the 3 lines. The sentiment is from a stamp sentiment I bought long time ago (don't have the brand). Finally the buttons with the twine add the perfect embellishment.


I like the white-orange combo with pop of black through striped pattern paper and button!


Until next time..

Happy Krafting,

Cheers =)

Thursday, June 26, 2014

Color in Life

Simon Says Stamp's March Card Kit had this stamp set called Color and Sunshine. There are some images in this set that you could play around with- crayon, rainbow, sun, smile face... and quite a few words to create your own phrases. 

So this is from the March Kit.... and I have not used this set at all..I just could not see myself using the crayons or doing something with the rainbow. I think my style is pretty simple and I use only certain images.... however I always wondered how card makers can use these different images and come up with such pretty cards. That is one of the reasons I enrolled in this monthly card kit. 

So here is my card using Color and Sunshine stamp set:


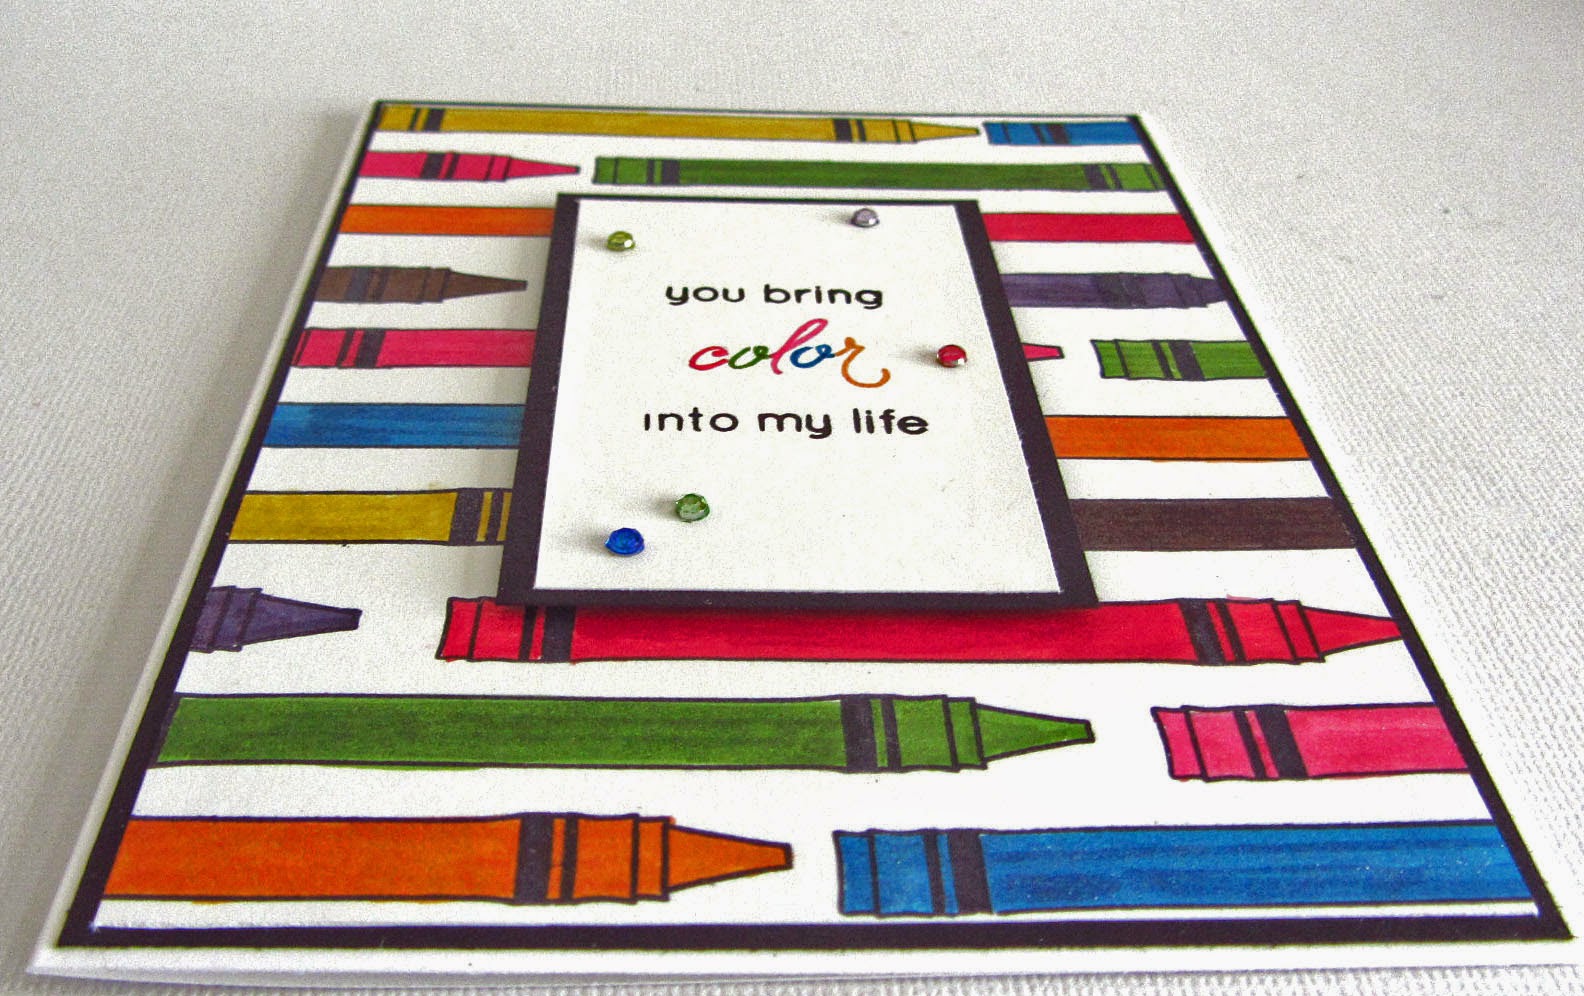
So I wanted to use this crayon image. It is an outline image... I wanted to stamp few...like they were scattered... but could not stamp them directly...so I decide to make a background with it. Stamping it multiple times and I used some Stampin' Write Markers (Stampin' Up!) to color them in.... bright colors :))


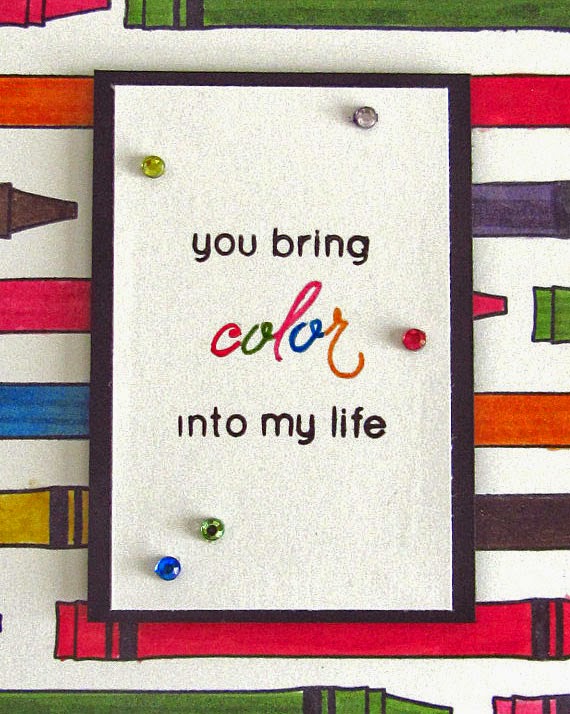
I also added subtle glitter with Wink of Stella Clear Glitter pen... hard to see in the images... but it adds a nice, subtle shine. The sentiment is 3 different stamps, part of the Color and Sunshine set, that I stamped to form this phrase. Since these are clear, see through sets, placement is very easy. 


 The little rhinestones were clear... but I used some Copic Sketch Markers to color them in and glued them down around the sentiment. The sentiment make this card appropriate for any age, could be from parents to their kid, or from husband to wife, or friend to friend!!

Even after completing it...I was unsure... but now looking at the pictures...I think it does not look bad!!

Until next time,

Happy Krafting,

Cheers =)

Birthday Mail

My Simon Says Stamp's JULY 2014 Card Kit finally got here yesterday :)) I had been waiting for it since I saw the release video and saw some of the crafters I follow making cards using the kit.... Love the stamp set that is included in the Kit... Sending Happy Thoughts There are 4 different types of envelopes, big and small sentiments and this design that you usually see on international mail envelopes!! Super cute. I love the envelope images....super cute!!!

So I started making the card yesterday (stamped the images, cut background papers) but did not finish it until this morning. I woke up early to bid hubbs goodbye as he went to work...plus could not wait to complete the card before running some errands. 

So here is the card:


Loved the pattern paper (which came in the kit)...and aren't those envelopes cute??? Most of the materials are from the Kit.... except the card base, the sentiments "Sending" (Your Next Stamp) and "On your Birthday" (Stampin' Up! Retired) and Oval punch (Stampin' Up!)


I stamped and hand cut the envelopes.... added hearts (included in the set), gave it some shine with Wink of Stella Clear Glitter Pen and added some Glossy Accents. These are popped up, so is the greeting at the bottom.


Absolutely love this card.... so cute and sure to bring a smile on the receivers face :)

Until next time,

Happy Krafting,

Cheers =)

Wednesday, June 25, 2014

Wedding Congrats

Today's card is used making Paper Player's Sketch 201. It is a simple little sketch... and I started thinking oh... this is going to be easy.... but took me forever to make it!! I think it was the theme. (Wedding)... that took me longer to make it... however, I did finish finally. Not sure if I'm happy with it... but again, Just coz I don't like it, does not mean someone else might not!

So here is the sketch from Paper Players:


Here is my version of the sketch:


Pretty simple and easy-- The Pattern paper is from Stampin' Up! (retired now) and the champagne glass image is from this stamp set I bought from Michaels/Hobby Lobby (not sure which store). I have had it for almost 2 years now... don't know the brand :( The sentiment is from Stampablities Greeting Words (Hobby Lobby). 

  
I highlighted the edges of the pattern paper, the 2 banners and the sentiment banner with some light pink ink. After finishing the whole card I thought it still looked plain...so I decided to scatter some pearls around.

Maybe it is the Pattern paper or the image... I am not sure...but something makes it feel like not such a great card!! However I made it, so I deicded to share. 

Until next time,

Happy Krafting,

Cheers =)

Friday, June 20, 2014

Baby Congrats


I woke up early and ran some errands this morning. With all work done .... I could get to card making without any interruptions... and this morning I created 2 cards!! This is what happens when you find that perfect sketch that could be made masculine and feminine way and quickly comes together. Actually, I made baby card and made a boy card and a girl card. 

So The Paper Players are having a celebration challenge. They reached 200th challenge and hence are having a fun challenge this week. So in their Challenge #200 they have revisited some of their old challenges and picked 6 all time favorite sketches/challenges. All the 6 challenges are awesome...So I decide to make card using this particular one.

When I saw it, I was like ah..nice simple card... then when I started to think what occasion card I wanted to make using this sketch... I ended up with Baby...and idea of a girl and a boy card. So here is what I ended up with:


I had these 2 sided baby pattern paper-one side has polka dots, the other baby footprints with respective gender written on it. I layered them on darker shades of blue and pink and used this sentiment from Your Next Stamp's Welcome Baby Sentiments. Some matching rhinestones and ribbon and the cards were complete. 


Love how simple the sketch was and how cute the cards came out... To see more pictures click on the Etsy links below.

Baby Boy- ETSY

Baby Girl- ETSY

Now I cant wait to try and make cards using other sketches in the challenge :D

Until next time,

Happy krafting,

Cheers =)

Wednesday, June 18, 2014

Purple Birthday


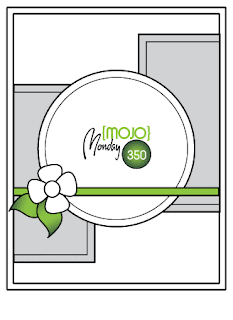
Today's card is made using Mojo Monday's Sketch 350 As soon as I saw the sketch, I loved it...I don't know it just looks elegant, pretty.....So I had to make a card using the sketch. Here is the sketch:

Here is my take on the sketch

To me the sketch is absolutely feminine... so as I soon as I started to decide on papers and stamps, I knew I wanted purple... purple is pretty feminine I think...especially added with pearls and some flowers. The pattern paper I was using did not work out the way I wanted, so I ended up using this other one. Yellow pattern paper adds a color pop and coordinates well with the purple.


The flowers, pearl and ribbon are perfect embellishments for this card. With all the papers, image and embellishments I kept the sentiment small and simple. A bigger sentiment would have made the card too busy I felt. Inspite of all the different shapes, the layout is still clean, simple and pretty!

The card is for sale on ETSY

Until next time,

Happy Krafting, 

Cheers =)

Tuesday, June 17, 2014

Thin Die Storage Box

So after the Business Card Holder, I had to make this next project- storage box for dies by Pootles. I loved how easy it is to make the box.... I started to think different ways I could use it... In my craft room...maybe in my classroom :D So I made one.... 


It is amazing how an 8-1/4" x 11" cardstock with some scoring can become a wonderful storage container :)) I followed the instructions by Pootles to the mark.... and it turned out perfect! I did glue an extra lining of cardstock to the bottom so it would be more sturdy and be able to handle the weight when I move it from the shelf to the craft table. 


I have 13 die cuts stored in here.... and there is still some space to add 1-2 more. Of course, loved it so much... that I tried to put in my stamps (clear stamps) and had to make more. So I ended up making 4 more and will have to make some more for stamps and embossing folders. 


I don't have as many cling/clear stamps... Most of my stamp collection is from Stampin' Up! that come in DVD like case... so storage for them is not hard. However, now I am buying them from Simon Says Stamp or Michaels and hence needed something to hold them. This boxes are just perfect. I sorted the stamps according to the occasion (and you can see in the picture I spelled occasion wrong on my box) using some pre cut alphabets or hand wrote if it was too much. 

The tutorial for this box can be seen HERE 

Until next time,

Happy Krafting!

Cheers =)

Birthday Prints

I have been organizing my clear stamp collection. I had them all in a photo box, but it was more of clutter as they were all mixed in. Every time I wanted to find a one I had to go through the whole box. Recently I found a tutorial by Pootles on making Embossing Folder or Thin Die Holder-- this will be another post...Coming soon!

Anywaz, So after I made those holders, and cleared out the stamps...I found this stamp set with border images... they are not full length borders, but nice sized to be able to make repeat patterns. There are some geometric borders and some swirly. Unfortunately I have no idea what Brand they are...But do remember getting them from Michaels... almsot 3-4 years ago!!! 

So here is the card I created using one of the images from that stamp set:

I am more of geometric person, so I loved this image. I created repeated patterns using 4 colors- all Stampin' Up! Inks-- Coastal Cabana, Pistachio Pudding, Summer Starfruit (retired) and Daffodil Delight. After stamping the image, I used wink of stella clear glitter pen and filled in all the circles (went over twice) and then alternate lines of the diamonds. 


The image was stamped 3 times on the same colored papers and used different sized punches to punch them out and layer. The sentiment is from Stampin' Up!'s Happiest Birthday Wishes set (retired). I did not stamp the sentiment on Daffodil Delight and used ribbon to wrap around the background. Some rhinestones and the card was done!

This card is for sale on ETSY

Until next time,

Happy Krafting

Cheers =)

Monday, June 16, 2014

Standing Business Card Holder

While it is Monday morning...thanks to my summer break all days seem to be the same :)) I like the summer break...I can have my breakfast and coffee with computer on...check mails, facebook, watch crafting videos on youtube :D All the awesome crafty channels I've subscribed to will have some video new video...otherwise catch up on their old videos.

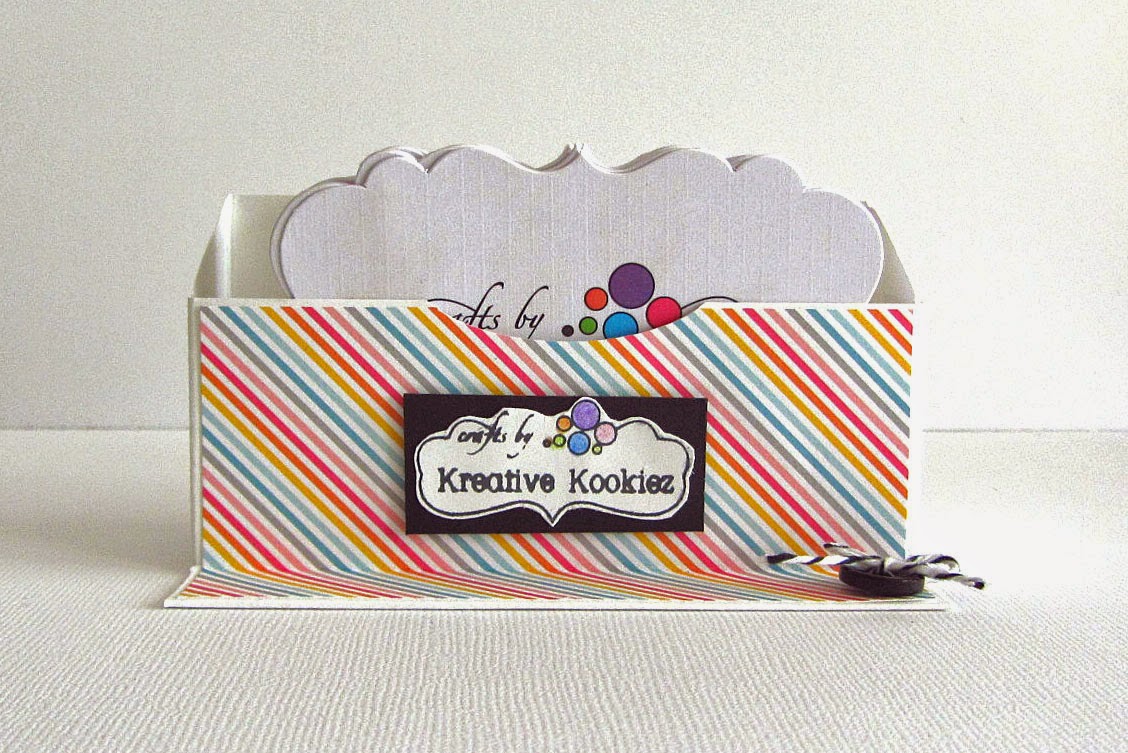
Doing the same, I was watching Pootles Paper Craft's Freestanding Treat Bag Video. In that she mentioned about Free Standing Business card Holder.... I know!! A business card holder, that will not fall off as soon as you put your business cards!! I had to you tube search it and found the video and already made one to hold my business cards =) Super Cute!!!!


A cute nice sized holder... that holds plenty of cards. It has these flat bottom (call them feet if you may please) that holds it upright making it perfect to sit on shelf/table. I decorated the front using KK logo stamp, free hand cutting it and popping it using 3-D foam tape. A small black button with black and white twine tied into a bow! Even though it is sitting flat, I still added a strip of cardstock on the inside bottom to make it a little more sturdy so if I have to move it or transport it, the cards don't weigh it down.


Absolutely precious--perfect at craft fairs or to put with your products at local boutiques or even perfect to sit on your desk if you work in an office :D Best part is...it can be customized as per your desire- your favorite color combo, design etc. 

Pootles has perfect tutorial on how to make this easy card holder.....visit HERE for the same. The measurements are in her post as well as there is a link to the video tutorial. 

Until next time,

Happy Krafting

Cheers =)

Sunday, June 15, 2014

Flower Circle Birthday

The card today is inspired by CAS(E) this Sketch's Sketch #77 A simple sketch with different sized images of the same style/shape and a simple sentiment. Such simple sketches always bring out some nice looking cards I think. 

So the sketch looks like this: 

Here is my version of this sketch


I used Simon Says Stamp's Thinking of You set..which was part of their February Card Kit 2014. It is a cute set with some nice flowers and sentiments. I like the layering of flowers that you can do through this set. 


The sentiment is from Stampin' Up!'s A word for you. I added the rhinestones in place of the smaller circles and decided to add some smaller rhinestones in the middle of flowers. The flowers have been glittered using Wink of Stella Clear glitter pen (my fav!!). 

I love the simplicity and the colorfulness of this card.... sure to bring smile on receivers face :)

This card is for sale on ETSY

Until next time,

Happy Krafting

Cheers =)

Friday, June 13, 2014

Gift Box

I have always loved making 3-D projects...especially bags, boxes and gift card holders. A lot of time I am asked if I could make boxes for favor....however, I had never found the perfect way of making them until now. I started watching videos by Pootles Paper Craft . Pootles is Ms. Sam and she is an independent demonstrator in UK and an absolute genius when it comes to make boxes and bag. She creates all these fab projects and shares them on her You Tube channel. 


So today's box is called Baby Bib Box-- it is a cute little box.


It fits 2 baby bibs :)), I was able to fit 2 ink pads.... or you could fit in quite a lot of candy.


It is like those boxes in which perfume bottles come in!! Finished box size is 3-3/4" length, 4-1/2" tall and 1-1/2" wide. 

Ms. Sam has a wonderful video tutorial to make this box on her you tube channel. Click Here for the video. 


Decorate the outside as you like... make it nice and jazzy with some ribbons and glitter or keep it simple!!


I simply love all the projects she makes... so much so that her projects inspired me to get Envelope punch board. (Mine is by We R Memory Keepers, Stampin' Up! sells them too.) She makes some cute gift bags and boxes using this board as well. But most of her projects are  simple and super easy to make. I intend to try some other projects by her.

Until next time,

Happy Krafing

Cheers =)

Thursday, June 12, 2014

Red Blue White Birthday

This is a card that I created to play in the Paper Players Challenge 199. It is a color challenge and the colors given are Real Red, Whisper White and Night of Navy (these are all stampin' Up! colors). Whenever you do color challenges, you necessarily do not have the same brand ink pads or cardstocks and that is absolutely okay. The idea is to use nearest possible colors. So If I did not have Stampin' Up! colors, I would look for Red, White, and Dark Blue. 

Anyway, here is my creation:


So I use Stampin' Up! stamp set called Plaid. It seems to have retired, but it is a set of 4 plaid design stamps. They are all different images. I chose plaid argyle for this card. I had to stamp 6 times to cover the whole cardstock... and also had some overlaps... but it just adds some quirkiness I think. 


The sentiment is from this old stamp set that I have had for a while now. I stamped it using Night of Navy and Real Red ink markers and stamped it twice and use 1/2" circle punch on one to punch out the U. Some wink of stella glitter and glossy accents puts some nice emphasis on the "U". 

I have always like the red, blue , white combo...so this was a fun challenge to play with :D

This card if for sale on ETSY

Until next time,

Happy Krafting,

Cheers =)

Let's Celebrate

This card is inspired from Mojo Monday's Sketch 349. A nice, simple sketch which is in landscape mode... 


But I switched it to portrait mode and made minor change to orientation of stripes to match my background paper.  I liked how the sketch can be used to make a masculine or feminine card. I ended up with a unisex card... at least I think it is unisex card :))


The pattern paper is from Simon Says May Card Kit 2014. Layering it on black cardstock makes the pattern paper pop out. I cut out strips of some color from remaining paper and aligned it to make a continuous look and use white gel pen to make faux stitch outline. 


The sentiments "Let's Celebrate" and "On your Birthday" are from On Your Birthday by Stampin' Up! (retired now) and are popped. Some more faux stitching and enamel dots complete the simple look of the card. 

The sketch was simply fun... infact I have another idea using the same sketch that I am planning to try :)) Will post it as soon as it is complete :D 

This card is for sale on ETSY

Until next time,

Happy Krafting

Cheers =)

Wednesday, June 11, 2014

Tons of Fun Birthday

Elephant stamps are so cute. I had bought this stamp set from Michaels. It is Birthday Elephant by Inky Antics. It also creates a pop up Balloon (instructions are on the package). However, I really like the elephants and the sentiments it comes with. Super cute. So after my attempt to make a Wedding Card with another elephant stamp set, I decided to finally use this one. 


 Isn't he cute??? So I water colored the elephant using Smoky Slate and Blushing Bride inks by Stampin' Up! The Balloon is a die cut that I cut using Simon Says Stamps Balloons Craft Dies. The sentiments are from the same stamp set which I embossed using Pearl Powder that goes with the gray look. 


I used Wink of Stella clear glitter pen over the balloon and the sentiment. Silver gel pen and a ruler make fantastic hand drawn border :D

This card is for sale on ETSY  

Until next time,

Happy krafting

Cheers =)

Baby Girl Congrats

Today I have a custom order card for a Girl Baby Shower..... I decided to go all pink and brown for this card. 

Isn't she cute?? I used the Baby Bundle stamp set by Stampin' Up! (retired now) to stamp and cut the stroller and the baby. I hand cut the little bow to emphasize the girl part (as if all the pink does not scream that :P) Simple pink brown pink layers of cardstocks make such a pretty background for this simple card. 2 clear rhinestones give it a perfect finishing touch.


The pattern paper has a subtle shine, which is hard to see in the picture...but that shine (sort of glossy) looks really pretty. Yes, I used Wink of Stella clear glitter pen on the polka dots on the stroller, the heart and the bow. The sentiment "Congratulations" is from Greeting Words by Stampabilities (from Hobby Lobby). 

Hopefully both, my friend (who ordered it) and the receiver of the card, like it :D

Until next time,

Happy Krafting,

Cheers =)
Tuesday, June 10, 2014

Wedding/Engagement Congrats

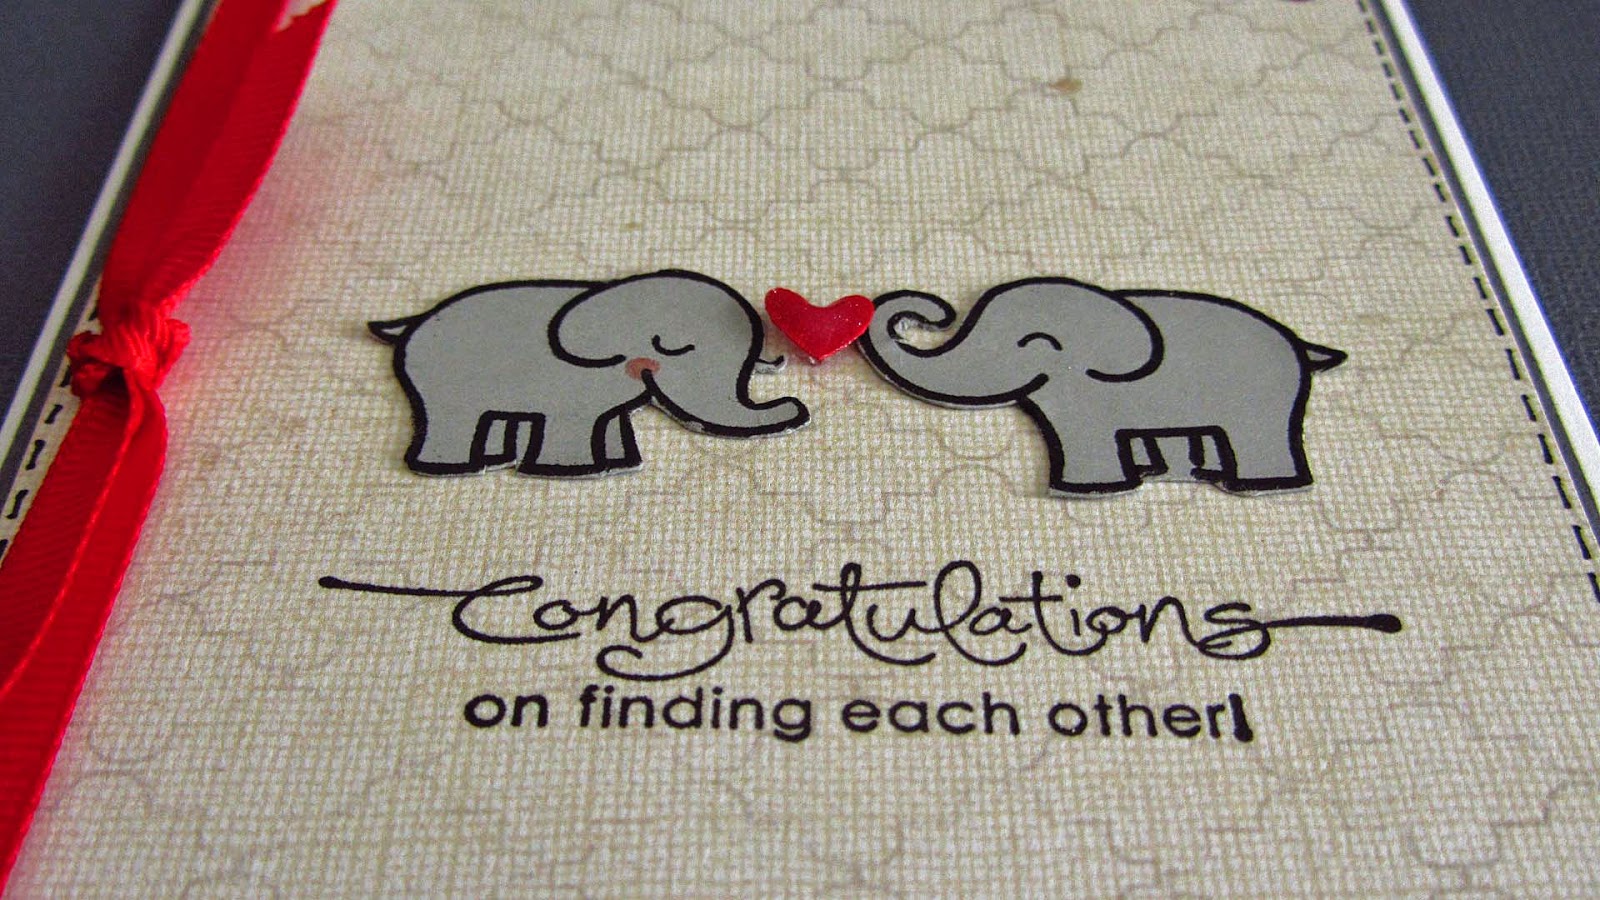
Today I have a cute little card to wish someone on their engagement or for their wedding. Usually when you think wedding you think posh looking elegant images. At least that's how I usually think of it and end up making such cards. So I decided to go a little different and use this Lawn Fun stamp set called Love You Tons .... it is super cute with 2 elephants- a girl and a boy elephant. First time I saw it .. I wanted it... but like I said before... wedding = elegance!! Anywhoo I finally gave in and bought this stamp set and here is the card I made using it. 


The pattern paper still brings in some elegance I think, however the elephants make it extremely cute!! I popped the tiny heart using some glue dots and layered it with Wink of Stella clear glitter pen and Glossy Accents- makes the heart more 3-D like. I do not have the elephant dies just yet, so had to hand cut these. Since the card was turning out Gray-ish. I decided to add pop of red through the ribbon and rhinestones. 


The sentiment is from Stampin' Up! - A Word For You (retired now). The sentiment I feel is perfect for engagement or wedding!! The cute elephants make the card fun and happy. 

This card is for sale on ETSY

Until next time,

Happy Krafting

Cheers =)

Monday, June 9, 2014

Happy Baby

Today I have another Scrapbook Page... of my 2nd God child..... He is all smiles and I call him Happy Baby.... so I decided to make a scrapbook page with the same title.... I had multiple pictures of him smiling and it is so weird how some silly actions make him smile and squeal up!! Precious!!


So I decided to go all brights and colorful. Keep it simple and journal list of things that make him smile. I love using Faux stitch and had to add it here too... It just adds interest to the design I think. 


Some simple embellishments with wordings to describe the pictures and some blue bling give it a nice finish I think. The pictures, more so his adorable smile, make the whole page look cute. 

Until next time,

Happy Krafting!

Cheers =)