Monday, April 30, 2012

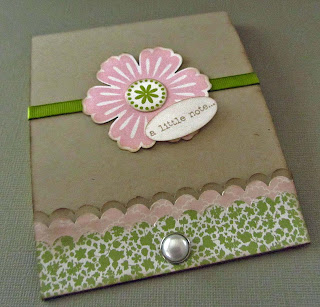
Mini Pad cover... with name!

So my sister wanted a mini pad covered with her name on it, but also have her frogs on it. Luckily I found this funky frog in my stamp stash. It had sentiment "great job" with it.. I just taped it before inking the image and would remove it before stamping the image- Fun background. Just kept it simple by adding her name on it.


It turned out nice I think... Yes I love sponging the edges :D

I am sure she is going to love it =) 

Until next time,

Happy Krafting,

Cheers =)
Thursday, April 26, 2012

Another cover for the Mini legal pad

Yes it looks like I am obsessed with these pads and making their covers... well after trying the first one.. I made one for my friends whom I am gonna see soon... she has been complaining that I never gift her all the wonderful things I make.... so when I tried this...I thought I could make her one..the Tutorial for which I posted yesterday.

As I posted it on our Facebook page, my sister asked if she could have one.. preferably with a frog (she has collection of Frogs in all possible things... except for a live frog!!!!) So today morning I got to work and made this.....


Punch Art frog... stuck to the cover. This punch art frog is the cutest punch art I have found. This is from Stamping with Frenchie... I love her punch arts. The punch art frog for Chocolate Nugget holder has a video as well on how to make this frog. Instead of putting the frog on the chocolate holder, I taped it here with sticky strip. Love the frog :D


Also, instead of using ribbon and brad as closure, I just used ribbon which is taped to the back using sticky tape (just put tape on ribbon ends) and wrapped around the front. Just slide out the ribbon when you want to open it and slide it back on when done. The ribbon is 13-1/4" long and 1/4" wide. You will have to play around with the ribbon to have just right fit so that it easily slides in and out.

Will keep experimenting more =)

Until next time

Happy Krafting,

Cheers =)

Saturday, April 21, 2012

Petite Purse


How cute is this little purse!!!


This little purse was made using Petite Purse Bigz Die by Stampin' Up! which is available for limited time right now- #125606. The die has the main purse and handles in it. All you need is a 8"x6" sheet of Cardstock or Designer paper, run it through the Big Shot and voila, you will have the pieces. Simply fold on the scored lines and the box comes together in a jiffy- Simple and easy. 


The picture makes you think it might be a decent size, but it is definitely a mini purse... . To give an idea how much it holds:
In this picture I have put it in 4 Hershey nuggets. It could also hold 2 fun size chocolate bars or simply put in little trinkets for favors. It is perfect favor box. 


One last view of the mini purse:
I simply love this cute little purse :D... going to think of variations for this.


Until Next time,


Happy Krafting,


Cheers =)


Friday, April 20, 2012

Matchbox Post it Note Holder

The revived Stampin' Up Success (Stampin' Up! Magazine for demonstrators) has some wonderful ideas now for the demonstrators to conduct workshops. This time for Make and Take workshop they have Matchbox Post it Note Holders. Wonderful idea... to carry post it note in your purse :D

They have dimensions for 3 different sizes of post it notes. But the size of post it notes in my house is not mentioned in the directions. I use 4x4 post it notes that are ruled (I feel I can write better with the ruled lines :D) But I loved this matchbook style cover for it. I won't have to carry the bulky notebook that I usually do. This would be just perfect. So after some trial and error I got it :D


I kept it simple, tried not to pop it too much so that in the purse it will not come apart. 

The inside view:


Modified Template:
Cardstock measuring 11-1/4" x 4-1/8" and score it long side at 4-3/8", 4-3/4" and 9-3/4"

Some more views :


Until Next time,


Happy Krafting


Cheers =)

Wednesday, April 18, 2012

Amazing, Incredible one who does it all

So here is another Mother's day card for my Etsy Shop

Crumb Cake base card is layered with Early Espresso embossed cardstock.  I used some clear embossing powder to give it a shiny look and then sanded it a little. Then I sponged the embossed CS with some Early Espresso and Old Olive ink.


Until Next time,

Happy Krafting,

Cheers =)

Tuesday, April 17, 2012

Mothers day is around the corner

Mother's day is on 13th may. So I thought I should get started on making some cards for my Etsy shop. So here is a simple card using Framelit dies (Stampin' Up!) and coordinating stamp.


Stamped the image using Staz-On ink and colored it in with Aqua painter, and added some tiny pearls. I popped the image using 3-D glue. Simple yet elegant =)


Until Next time,


Happy Krafting =)


Cheers.

Sunday, April 15, 2012

Sweet for the Sweets

My dearest friend and business partner's Birthday is tomorrow and I made this for her... only if it would reach her in time. I think I mailed it in good time. 


So here is the card:


She loves chocolates and bright cheery colors. So I thought of using some bright pastels with some candy stamps. 


HAPPY BIRTHDAY DHAARNA


Until next time,


Happy Krafting


Cheers =)

Friday, April 13, 2012

Direction of your dreams

Here is a card I made-custom order. The grad is coming out of University of Florida- GATORS. Orange and Blue are their colors. Only if I had a gator stamp ;) So I decided to use the colors orange, blue and green to make this card.


So the photograph did not turn out as good... but it does look much better than it does here ;)

Until next time,

Happy Krafting

Cheers =)