
So scanning through the resource pages of Splitcoaststampers website I came across Junior Legal pad. Now you have seen my posting from last week on Matchbox style Post it Note Holder, So when I saw this I was obsessed with trying it and having small pads for quick notes in my purse :D
The Junior legal pad is actually cut into half -- I am not a fan of that. So I decided to buy some 5" x 8" legal pads (from Office depot). Then I had to stop by at staples for coin envelopes for another project (from splitcoaststampers) and I saw these mini legal pads- they are a pack of 3 for $1.

These are 3-1/2" x 5-1/4" and look absolutely cute. So wouldn't they be perfect to carry around instead of some of the bulky notebooks we get--spiral bound, or wire bound!!! Now I know we could carry these as they are, but hey nothing like spicing it up with some bright colors and little decor :D that's what we crafty people do ;)
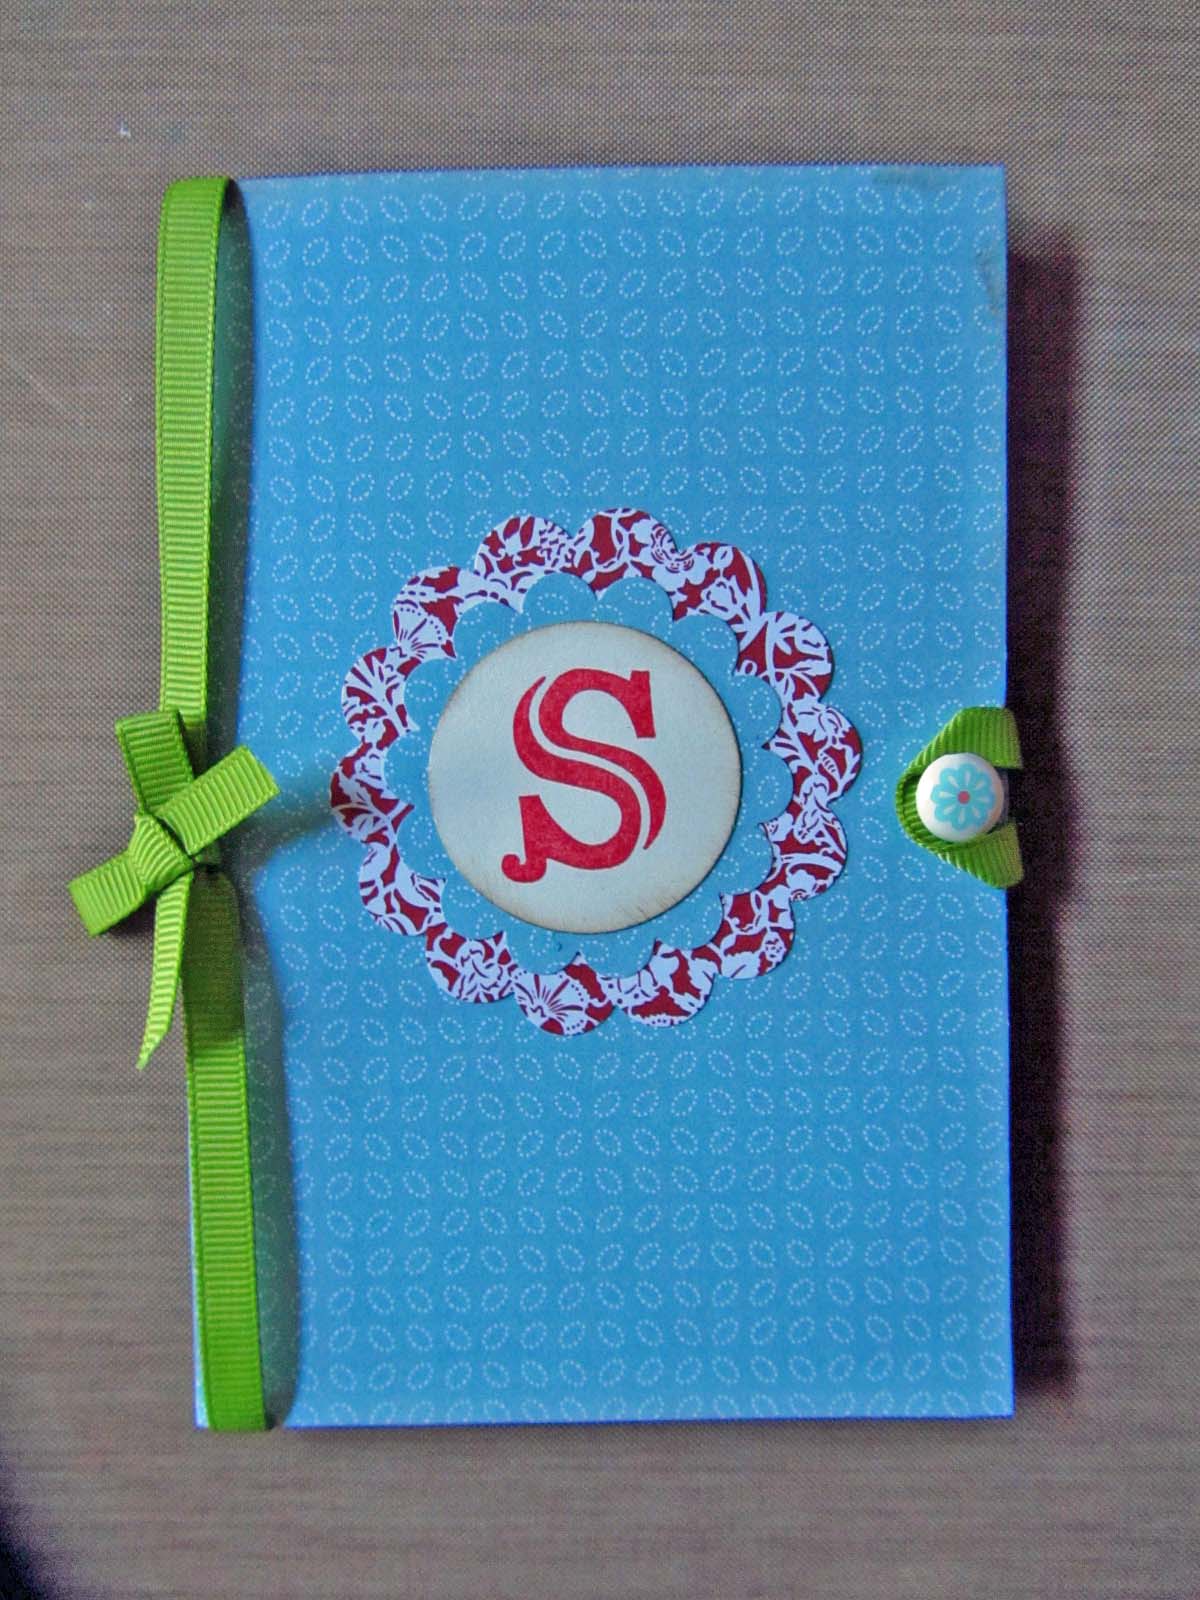
So after some trials and experiments, I finally made it .... can not say it is perfect but I like it.. and I am sure all my friends for whom I will make this will like it too =) So this is a sample I made yesterday:
 Since
I was working on the measurements and everything, I did not click
pictures of every step like I had hoped. So here is how I made it.
Since
I was working on the measurements and everything, I did not click
pictures of every step like I had hoped. So here is how I made it.
 SUPPLIES:
1 mini legal pad measuring 3-1/2" x 5-1/4"
Paper:
1- 12"x12" Designer paper ( I used Summer Smooches available for limited time from Stampin' Up!)
1- 12"x12" coordinating Cardstock (Night of Navy - Stampin' Up!)
Scrap pieces of Whisper White and Daffodil Delight (Stampin' Up!)
Ink:
Crumb Cake and Rich Razzelberry
Ribbon:
Rich Razzelberry- 1/4" grosgrain style
Stamps:
Broadsheet Alphabet (Stmapin' Up!)
Punches: (not in the picture)
1" Sqaure punch, 1-3/8" sqaure punch, Scallop Sqaure Punch ( Stampin' Up!)
Brad
Tools:
Paper piercer, Scoreboard, Paper cutter, Sticky Strip, Tombo Glue,
Procedure:

STEP 1: Cut the cardstock to 7-1/2" x 5-1/2" and score at 3-5/8" and 3-7/8" on the long side. Fold on score lines.- this will be the base cover for the pad. Cut the Designer paper to 3-3/8" x 5-1/4" for layering. Cut a small piece of the Designer paper measuring 1-1/2" x 3-1/2" for covering the top of the pad.
 STEP 2: Layer the Designer paper on the Cardstock.
 STEP 3:
Use the small strip of designer paper. I did not score this as I was
not getting the measurements right. So I just put sticky strip on the
front and the back. I started with the front making sure I layered the
edges together and pressed it down to the back.
STEP 3:
Use the small strip of designer paper. I did not score this as I was
not getting the measurements right. So I just put sticky strip on the
front and the back. I started with the front making sure I layered the
edges together and pressed it down to the back.
 STEP 4: Stamp
letter K (my friend's initial) from the Broadsheet Stamp set on Whisper
white and punch it out using 1" square punch. I also punched Scallop Sqaure in Daffodil Delight and 1-3/8" square in Night of Navy. Layer them together.
STEP 4: Stamp
letter K (my friend's initial) from the Broadsheet Stamp set on Whisper
white and punch it out using 1" square punch. I also punched Scallop Sqaure in Daffodil Delight and 1-3/8" square in Night of Navy. Layer them together.

STEP 5: Add glue strips to the back of the pad and glue it inside of the base cover. Make sure you glue it close to the scored line.
 STEP 6:
Glue the Initial in the center of the front. Also add the brad (you
could measure to find the center to make a hole for the brad). Tie a
ribbon to add some interest.
STEP 6:
Glue the Initial in the center of the front. Also add the brad (you
could measure to find the center to make a hole for the brad). Tie a
ribbon to add some interest.
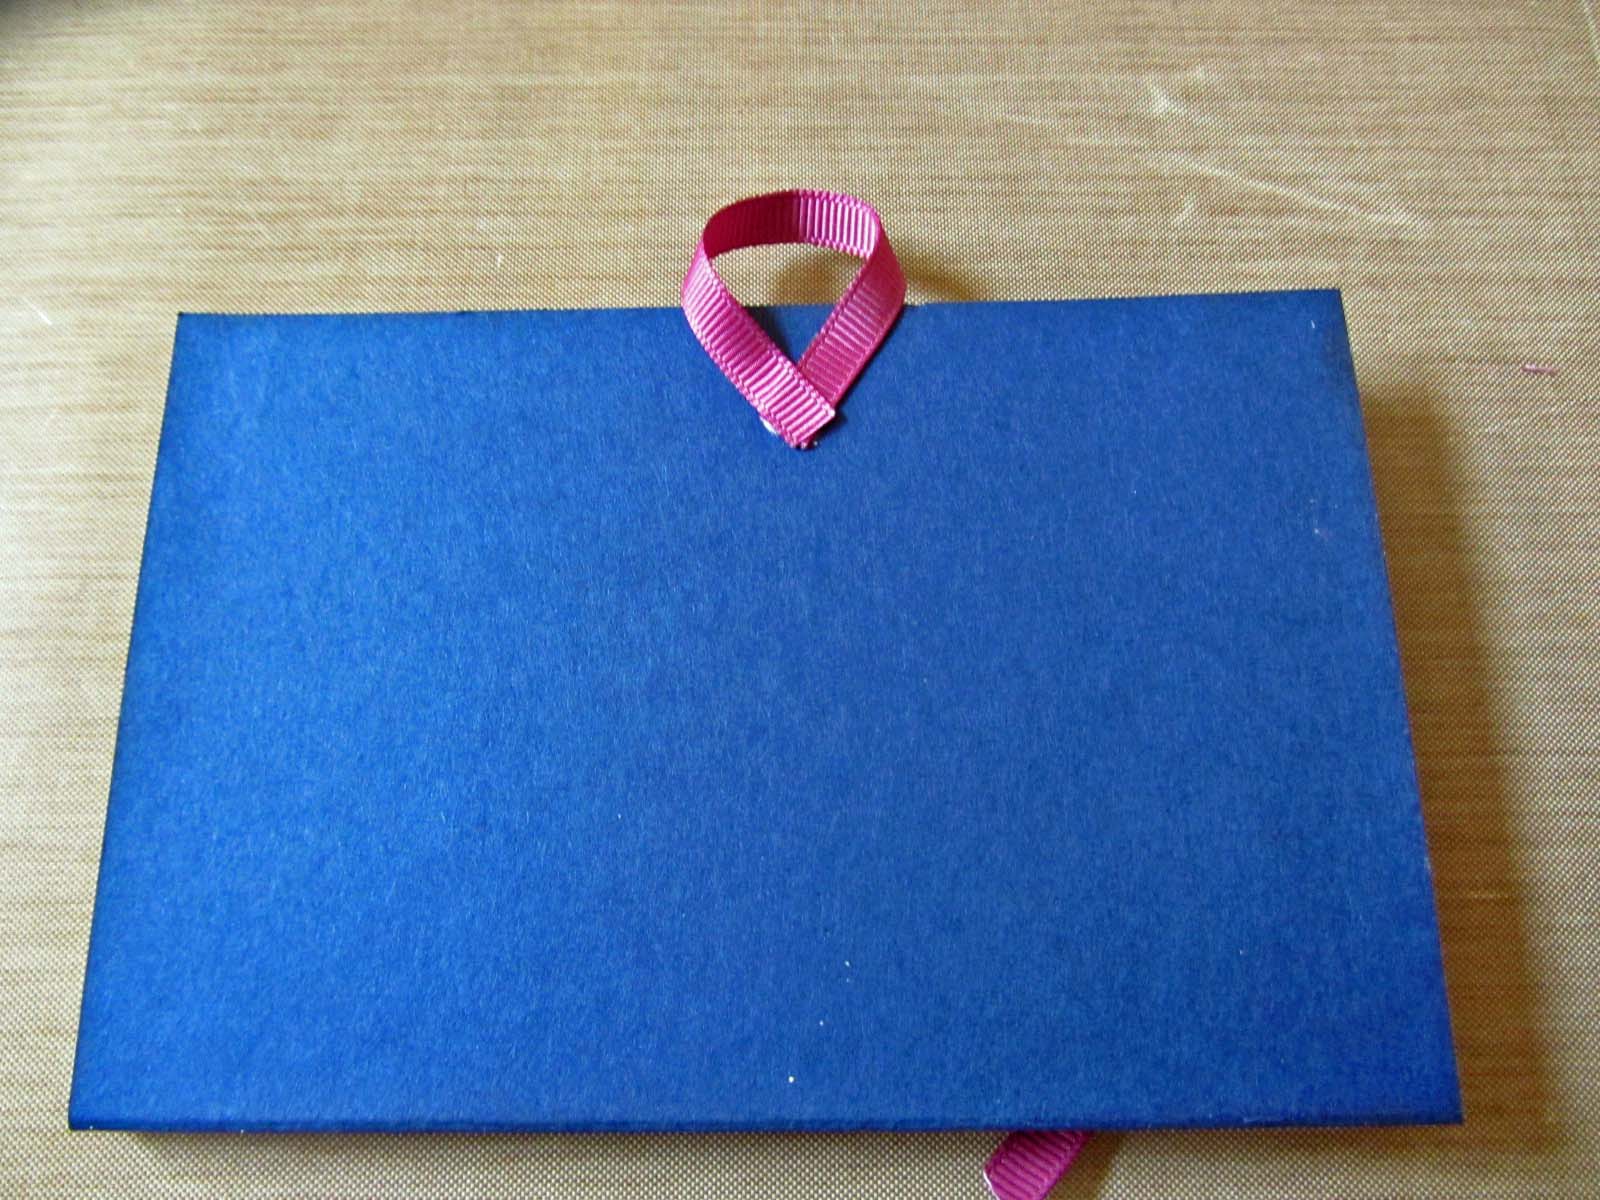
 STEP 7:
Cut out a 3-1/2" piece of Rich Razzelberry ribbon. Put sticky strips on
both ends, form a loop and glue it to the back making sure the loop is
hanging out enough for it to get into the brad.
STEP 7:
Cut out a 3-1/2" piece of Rich Razzelberry ribbon. Put sticky strips on
both ends, form a loop and glue it to the back making sure the loop is
hanging out enough for it to get into the brad.
The completed cover:

The inside:

One last look:

Love it... Now hopefully my friend will love it as well :D
Until Next time,
Happy Krafting
Cheers =)
The Junior legal pad is actually cut into half -- I am not a fan of that. So I decided to buy some 5" x 8" legal pads (from Office depot). Then I had to stop by at staples for coin envelopes for another project (from splitcoaststampers) and I saw these mini legal pads- they are a pack of 3 for $1.

These are 3-1/2" x 5-1/4" and look absolutely cute. So wouldn't they be perfect to carry around instead of some of the bulky notebooks we get--spiral bound, or wire bound!!! Now I know we could carry these as they are, but hey nothing like spicing it up with some bright colors and little decor :D that's what we crafty people do ;)
So after some trials and experiments, I finally made it .... can not say it is perfect but I like it.. and I am sure all my friends for whom I will make this will like it too =) So this is a sample I made yesterday:

1 mini legal pad measuring 3-1/2" x 5-1/4"
Paper:
1- 12"x12" Designer paper ( I used Summer Smooches available for limited time from Stampin' Up!)
1- 12"x12" coordinating Cardstock (Night of Navy - Stampin' Up!)
Scrap pieces of Whisper White and Daffodil Delight (Stampin' Up!)
Ink:
Crumb Cake and Rich Razzelberry
Ribbon:
Rich Razzelberry- 1/4" grosgrain style
Stamps:
Broadsheet Alphabet (Stmapin' Up!)
Punches: (not in the picture)
1" Sqaure punch, 1-3/8" sqaure punch, Scallop Sqaure Punch ( Stampin' Up!)
Brad
Tools:
Paper piercer, Scoreboard, Paper cutter, Sticky Strip, Tombo Glue,
Procedure:

STEP 1: Cut the cardstock to 7-1/2" x 5-1/2" and score at 3-5/8" and 3-7/8" on the long side. Fold on score lines.- this will be the base cover for the pad. Cut the Designer paper to 3-3/8" x 5-1/4" for layering. Cut a small piece of the Designer paper measuring 1-1/2" x 3-1/2" for covering the top of the pad.


STEP 5: Add glue strips to the back of the pad and glue it inside of the base cover. Make sure you glue it close to the scored line.

The completed cover:

The inside:

One last look:

Love it... Now hopefully my friend will love it as well :D
Until Next time,
Happy Krafting
Cheers =)
No comments:
Post a Comment