
In my last posting I had mentioned that I am working on another wall piece for my game room. The piece had been ready for few days now, but being busy with other things around me ...never got to putting it here =)
So my game/fitness room has a pool table, dart board and carrom board. So I wanted to start with some wall piece related to billiards/pool table. Looking through a decal making website (as usual forgot to keep the link/name.... GOTTA REMEMBER THAT NEXT TIME) I found this:

I liked those words...so billiard like... but not a fan of putting it on chalkboard. I got the idea of making cutting the letters out of chipboard and putting it in a floating frame (frame without matting). So I stenciled the letters and used a 3-D pop up glitter glue.
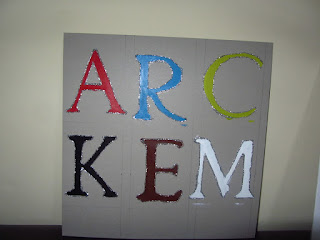
I used acrylic paint to stencil the letters. I am not as neat... so there is some paint here and there. But I was cutting the letters out, so no worries ;)
Well next was the frame... original idea was to put the letter in the frame. But then it occurred, maybe I could give a green background making it look like an actual table =) So I lined one of the glass in the frame using some Garden Green (Stampin' Up!) cardstock with a double sided tape (the tape side will be the back so no worried about it showing)

After I cut out the letters and glued it on the frame (used some snail glue) it still looked empty. I forgot to click a pic of it on this stage :( Anywaz so I decided to make 2 cue sticks and glue them on the bottom with a black #8 ball. But I could not draw the sticks out well. So I chucked the idea.... and decided to make the balls =)
So I punched 16-2" circles. Now I googled the billiards ball (too lazy to go downstairs :D), they have 7 solids, 7 striped, 1 black ball and 1 white ball. So i punched out 7 solids from different colored Cardstocks. Then punched 8 white balls and using markers colored to make stripes. I also used 3/4" Circle punch making 15 circles and writing numbers 1-15. I glued the numbers on the center of each circle ball. ( I know would have been easier if I clicked pics of all this...but I am learning slow ;D)
So here is the final wall piece:
I liked how it turned out... my husband thought it was good as well (yayyyy). So another view of the frame:

It will be soon going on my wall =) while I also start working on another idea for the same room.
Until Next time...
Happy Krafting =)
Cheers
So my game/fitness room has a pool table, dart board and carrom board. So I wanted to start with some wall piece related to billiards/pool table. Looking through a decal making website (as usual forgot to keep the link/name.... GOTTA REMEMBER THAT NEXT TIME) I found this:

I liked those words...so billiard like... but not a fan of putting it on chalkboard. I got the idea of making cutting the letters out of chipboard and putting it in a floating frame (frame without matting). So I stenciled the letters and used a 3-D pop up glitter glue.

I used acrylic paint to stencil the letters. I am not as neat... so there is some paint here and there. But I was cutting the letters out, so no worries ;)
Well next was the frame... original idea was to put the letter in the frame. But then it occurred, maybe I could give a green background making it look like an actual table =) So I lined one of the glass in the frame using some Garden Green (Stampin' Up!) cardstock with a double sided tape (the tape side will be the back so no worried about it showing)

After I cut out the letters and glued it on the frame (used some snail glue) it still looked empty. I forgot to click a pic of it on this stage :( Anywaz so I decided to make 2 cue sticks and glue them on the bottom with a black #8 ball. But I could not draw the sticks out well. So I chucked the idea.... and decided to make the balls =)
So I punched 16-2" circles. Now I googled the billiards ball (too lazy to go downstairs :D), they have 7 solids, 7 striped, 1 black ball and 1 white ball. So i punched out 7 solids from different colored Cardstocks. Then punched 8 white balls and using markers colored to make stripes. I also used 3/4" Circle punch making 15 circles and writing numbers 1-15. I glued the numbers on the center of each circle ball. ( I know would have been easier if I clicked pics of all this...but I am learning slow ;D)
So here is the final wall piece:
 |
| Sorry you see my hands there... tough clicking picture of glass frame ;) |

It will be soon going on my wall =) while I also start working on another idea for the same room.
Until Next time...
Happy Krafting =)
Cheers
No comments:
Post a Comment