Friday, August 31, 2012

Happiest Birthday Wishes

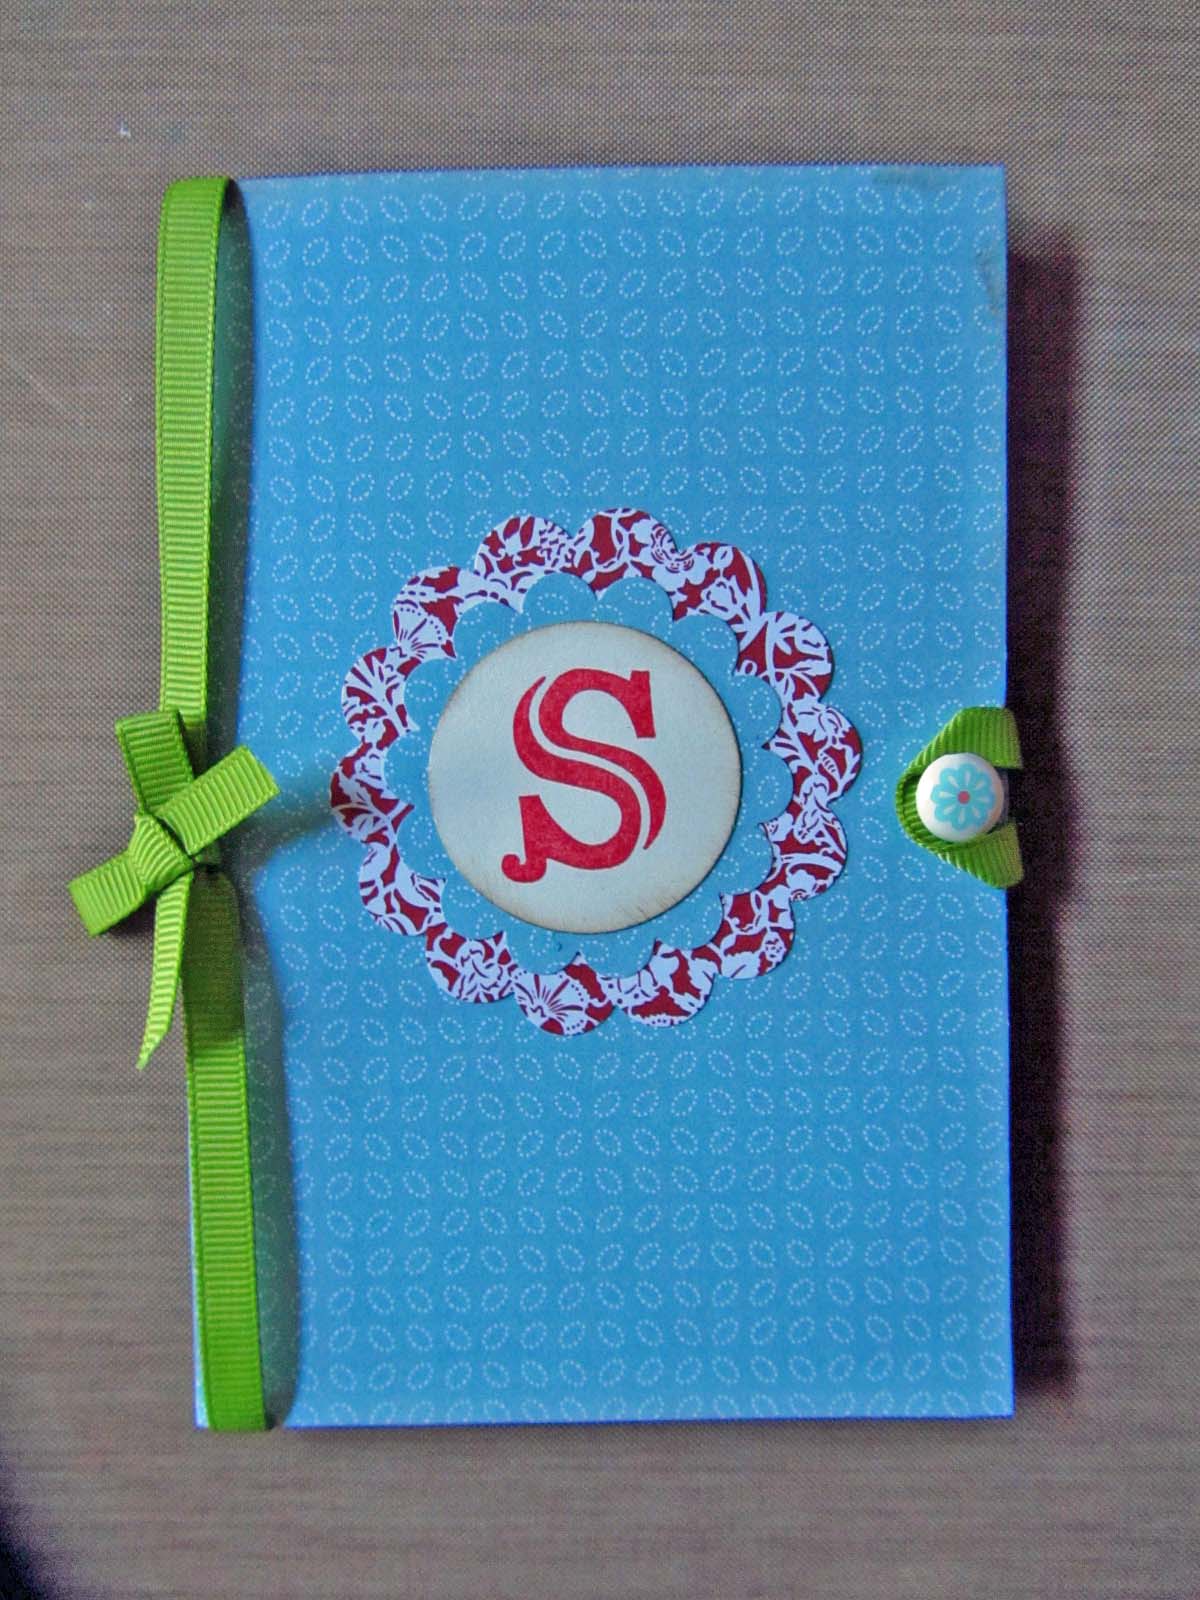
Another Birthday card today. Simple, cute and pretty. No fancy work for the today's card-sometimes simplistic things look for nice as well. 


The background paper is simply marvelous. Makes the card look elegant I think. A cake and simple wish with pretty double ribbons complete the card.


This card is for sale on Etsy: Happiest Birthday Wishes

This is all for today,

Until Next time,

Happy Krafting,

Cheers =)

Thursday, August 30, 2012

Birthday Bunch

Here is a cute little card with a cute color combo and stamp set called Upsy Daisy from Stampin' Up! A cute little stamp set I think.


The image is stamped with versmark ink on White CS and embossed with Clear Embossing powder. This gives a pretty little shine to the image. Then I used 3 different colors-sponged them on the CS with the image. Since the image is embossed, it won't catch color. Once all the sponging is done, just use a dry paper towel and swipe across, any residual ink on the image will come right off. It just adds the extra oomph to the image I think ;) 

Closer look:

This card is for sale on Etsy: Birthday Bunch

This is all for today,

Until next time,

Happy Krafting

Cheers =)

Wednesday, August 29, 2012

8-1/2" x 11" Cardstock Box

So I was surfing on pinterest and somehow I reached this blog which had this box/bag made out of 8-1/2" x 11" cardstock. Unfrotunately I closed it before saving the blog add... and I accessed it via my Ipad and now can't find it :( I am sorry to that blogger .... if I knew your name I could credit you for this. 

Coming back to the box...I have made a similar box. The difference between the One Sheet box and this treat box is the scoring lines. The instructions for One sheet box on Splitcoaststampers is well described with a video. 

To make this box, you just score on 11" side at 3/4", 4-1/2", 6-1/2" and 10-1/4" and on 8-1/2" side you score at 2" and 6-1/2". Follow rest of the instructions as shown in One sheet box


So it is little...wider than the one sheet box. The final bag/box measures 4-1/2" length, 2" wide and 4 -1/2" high. It is perfect for favors or giving out treats.


I added velcro closure so it stays well and can be picked up using the handles.


This is all for today,

Until Next time

Happy Krafting,

Cheers =)


Tuesday, August 28, 2012

Lacy Birthday

So with its new catalog, Stampin' Up! came with some new stamps, punches, and dies. The stamp set I used for this card is called Lacy and Lovely. It has these pretty images, which can be stamped to create background or can be stamped and punched. They are just super pretty. Since I wanted to make a birthday card, I knew it was going to be bright and pretty. So I decided to use Summer Starfruit and Melon Mambo and decided to stamp and emboss the Lacy image. I had recently bought pink opaque embossing powder- matched perfectly with melon mambo ;) 

So I took a piece of whisper white and randomly stamped the Lacy image over the CS with versamark ink, added some embossing powder and voila...had a nice bright layer for my card.


The picture looks so pretty n bright.....think how it looks in person :D So with the sentiment I felt it still felt like it needed something. So I added a ribbon (I love my ribbons)-COMPLETE. 


Love how the image turned out and how the whole card looks =)

This card is for sale on Etsy

That is all for now,

Until Next time,

Happy Krafting,

Cheers =)


Monday, August 27, 2012

Bag/Box for treats

So today's box is very easy and simple to make. Again inspired from splitcoaststampers-- this box called as Maria's treat Box is simply cute and adorable. Just put your goodies in a cellophane bag and put it in this box, or directly put them in. Although I like the cellphone idea.

Now the instructions on splitcoaststampers is simple wonderful and has a video too. So I am not going to mess with it-- Maria's Treat Box.

My version:


I did not decorate it much... this was just a trial to see how it turns out, how much it can hold etc...I mean lets be honest, it is hard to tell from pictures. But it is a pretty decent size- 5-1/2" high, 4" length and 2" wide. I had some ghiradelli chocolates lying around. So I put them in a cellophane bag and put them in the box.


I think I could have stuffed more...Oh well... but it is a perfect treat holder. After making this, thought maybe could add ribbon/paper handles- to the tall back or maybe by the actual box!! Will have to experiment. 


Simply cute. Thank you Maria from splitcoaststampers for sharing this. 

This is all for now,

Until next time,

Happy Krafting,

Cheers =)

Saturday, August 25, 2012

Gable box

I have been working on favor boxes over the weekend. Of course had to start from my trusty craft site... Splitcoaststampers. They changed their website lately...so their resources has been renamed as Tutorials. The favor box I made is called Gable Box. I had to google why they were called Gable Boxes. Found out that its the handles on the top thats why they are called gable boxes. Well whichever way, these are super cute. 


For the tutorial click on here- Gable Box

Instead of stamping like shown in the tutorial I added a patterned paper... I all about layering on cards, was not going to stop there....  had to try it here. The patterned paper is 10-1/2" x 3-1/4" and scored at 3", 5;1/4" and 8-1/4". I adhered the paper different ways on both the boxes (just to see which way was better. 

On the above pink box I adhered the paper before bringing the box together. On the blue box, I first put the box together, then glued the patterned paper.

Either ways work well...as long as the score lines (on the box and patterned paper) are lined up properly. After seeing few other boxes on splitcoaststampers, I realized that even if I did not score the patterned paper I could still glue it on well. Going to try that next time. 

These boxes are perfect for favors or giving out treats. I just love how they turned out. They can be decorated as per the occasion.

This is all for today. 

Until Next time,

Happy Krafting

Cheers =)

Mini Legal Pads covered

One of my previous postings showed how to cover these mini legal pads with measurements. These are some more decorated mini pads covered and decorated. 


These are perfect for you to carry with you-in your office bag or purse. The insides are yellow legal pads which measures 5-1/4" x 3-1/2".


Very easy to make...these are just awsome-ly cute ;)

This is all for today,

Until Next time,

Happy Krafting,

Cheers =)

Friday, August 24, 2012

Circle Birthday

I had been seeing these cards which have circles on them. I like geometric prints...and this stamp set Circle Circus is eye appealing. The nice prints stamped in bright colors and punched out using circle punches of different sizes add and interesting dimension to a card. So my card today uses this stamp set and some bright inks. 


While deciding which stamps to use, I decided to use the stamp with border circle print. I thought that it would be perfect to hold the Birthday wishes. 2 years ago I had visited a craft show with my friends in Columbia, SC. First time I saw the waterfall/cascading cards-these kids have like series of images tucked in and you pull a string and ribbon and all images are revealed. So they were selling these mini stamps to go on those little squares. That is what I used on this card. 


The circles are just super cute.... could not stop staring at the card ;)

This is all for today,

Until next time,

Happy Krafting,

Cheers =)

Thursday, August 23, 2012

Mini legal Pad

So scanning through the resource pages of Splitcoaststampers website I came across Junior Legal pad. Now you have seen my posting from last week on Matchbox style Post it Note Holder, So when I saw this I was obsessed with trying it and having small pads for quick notes in my purse :D 

The Junior legal pad is actually cut into half -- I am not a fan of that. So I decided to buy some 5" x 8" legal pads (from Office depot). Then I had to stop by at staples for coin envelopes for another project (from splitcoaststampers) and I saw these mini legal pads- they are a pack of 3 for $1.


These are 3-1/2" x 5-1/4" and look absolutely cute. So wouldn't they be perfect to carry around instead of some of the bulky notebooks we get--spiral bound, or wire bound!!! Now I know we could carry these as they are, but hey nothing like spicing it up with some bright colors and little decor :D that's what we crafty people do ;)
 
So after some trials and experiments, I finally made it .... can not say it is perfect but I like it.. and I am sure all my friends for whom I will make this will like it too =) So this is a sample I made yesterday:
Since I was working on the measurements and everything, I did not click pictures of every step like I had hoped. So here is how I made it.

SUPPLIES:
1 mini legal pad measuring 3-1/2" x 5-1/4"
Paper:
1- 12"x12" Designer paper ( I used Summer Smooches available for limited time from Stampin' Up!)
1- 12"x12" coordinating Cardstock (Night of Navy - Stampin' Up!)
Scrap pieces of Whisper White and Daffodil Delight (Stampin' Up!)
Ink:
Crumb Cake and Rich Razzelberry
Ribbon:
Rich Razzelberry- 1/4" grosgrain style
Stamps:
Broadsheet Alphabet (Stmapin' Up!)
Punches: (not in the picture)
1" Sqaure punch, 1-3/8" sqaure punch, Scallop Sqaure Punch ( Stampin' Up!)
 Brad
Tools: 
Paper piercer, Scoreboard, Paper cutter, Sticky Strip, Tombo Glue,  

Procedure:


STEP 1: Cut the cardstock to 7-1/2" x 5-1/2" and score at 3-5/8" and  3-7/8" on the long side. Fold on score lines.- this will be the base cover for the pad. Cut the Designer paper to 3-3/8" x 5-1/4" for layering. Cut a small piece of the Designer paper measuring 1-1/2" x 3-1/2" for covering the top of the pad.

 STEP 2: Layer the Designer paper on the Cardstock. 

STEP 3: Use the small strip of designer paper. I did not score this as I was not getting the measurements right. So I just put sticky strip on the front and the back. I started with the front making sure I layered the edges together and pressed it down to the back.

STEP 4: Stamp letter K (my friend's initial) from the Broadsheet Stamp set on Whisper white and punch it out using 1" square punch. I also punched Scallop Sqaure in Daffodil Delight and 1-3/8" square in Night of Navy. Layer them together. 


STEP 5: Add glue strips to the back of the pad and glue it inside of the base cover. Make sure you glue it close to the scored line.


 STEP 6: Glue the Initial in the center of the front. Also add the brad (you could measure to find the center to make a hole for the brad). Tie a ribbon to add some interest.


STEP 7: Cut out a 3-1/2" piece of Rich Razzelberry ribbon. Put sticky strips on both ends, form a loop and glue it to the back making sure the loop is hanging out enough for it to get into the brad. 

The completed cover:


The inside:

One last look: 


Love it... Now hopefully my friend will love it as well :D

Until Next time,

Happy Krafting

Cheers =)

Cherry on Top

BIRTHDAY CAKE are the yummiest thing to eat. I mean we all eat cake when we want, but Birthday cake has its own charm... the excitement of birthday celebrations, enjoying with friends and family and cutting the cake. Some might say its more a kid thing... come on, tell me that secretly you enjoy it. Don't you love the surprise cake your friends or colleagues get for you!!! Well today's card is cake with cherry on top ;)

I love the bright color combo of Red and blue.. with some green on it. The stamp set A Cherry on Top is a hostess set that you can earn if you host a Stampin' Up! party at your house.  I used the cake stand, and the sentiment from the set. But I wanted to add layer of cake and the cherry. So I cut rectangular piece of cake, with green border icing and stamped and cut the cherry. 


I like the texture on cake ... adds a little extra, I think adds cuteness :D The bright colors and cake make this a very cheery card.

This is all for today,

Until next time,

Happy Krafting,

Cheers =)


Wednesday, August 22, 2012

Flower Blossoms

After seeing the blossom Birthday card, a friend of mine requested for just the flowers for her daughter. She loves flowers, and is process of redecorating her room. So my friends thought her daughter could use the flowers in a frame to add pretty decor to her room, especially since she loves flowers. So they asked me to make Yellow and Green Flowers- daughter loves those colors. So using the Build a Blossom stamp set and Blossom Builder Punch, I created these flowers.


I did heat emboss to add something extra to the flowers. I did not want to add pearls in the middle. So I went for brads. I know I have said this earlier, but I simply love this stamp set and the punch. Makes just awesome looking flowers.

This is all for today,

Until Next time,

Happy Krafting,

Cheers =)

Tuesday, August 21, 2012

Birthday Blossom

If you are a flower person, this card is for you. This stamp set Build a Blossom is a nice set with different shaped petals and has a coordinating Blossom Petals XI Punch. So each petal has to be stamped and punched out individually, then can be put together. But the final product is just an awesome looking flower that simply looks beautiful.


I stamped the plain petal with Daffodil delight ink and then added pumpkin pie design in the flower and punched the petals out. The sentiment is from Sassy Salutations


Isn't it pretty??? I love it this stamp set and punch.

This is all for now,

Until Next time,

Happy Krafting,

Cheers =)


Monday, August 20, 2012

Wedding Dress

Yesterday the card was wedding cake. Today the card is another wedding card and using the same stamp set Love & Laughter. I love the wedding dress in this stamp set. The wordiness and the shape of the dress make it very pleasing to the eye.


I have been seeing white cards. I am a very colorful person with bright colors. But I decided to try it out for change. White is associated with wedding. So I tried some white on white with splash of color. Traditionally the dress is white, but just to add some color, I decided to stamp on red cardstock with silvery kinda color.


The dress is just super cute. But it looked incomplete. So I added the pearl, like a bow around the waist.

This is all for now,

Until next time,

Happy Krafting,

Cheers =)

Sunday, August 19, 2012

Wedding Cake

Wedding cakes are always pretty and delicious. Besides the bride and groom, cake is also the highlight (at least I feel that). I had this stamp set Love & Laughter It is all about wedding. Today's card uses the Cake from this set. It is a cake with wedding words like I do, cut the cake, Mr. and Mrs and sooo on. 


The background paper is nice and golden...with the print on it... it adds to the wedding look. The frame is new Window framelit. I simply love how it looks. 

A little close up:

A pretty card for the the happy couple =) 

This is all for now,

Until Next time,

Happy Krafting,

Cheers =)

Saturday, August 18, 2012

Sweet Beginnings

I have been making lot of cards lately (for a local store here ). I started to make some Baby Shower cards. I had bought this Clear stamp set from Michaels (again cant rem the name of the company) ... the stamp set was Baby themed. It has a pregnant lady (silhouette) stamp that I love and had made 1 card with it. So I decided to use the stamp again... and made 2 cards-one for boy and other for girl. 


There is something about silhouettes... they just make the card look so.... WOW :D The designer papers are from Stampin' Up! Nursery suite collection (retired now) Certain of the designs are in Pink and Blue...perfect for my card =) So I decided to make separate card for "It's a girl" and "It's a boy" shower. 

A closer look at the image:

 That little gemstone is perfectly placed to signify the whole reason a baby shower happens ;) --cute little one that is going tocome and fill joy in everyone's heart around him/her. 

Surely a heart-warming card :D

That is all for now,

Until next time,

Happy Krafting,

Cheers =)

Friday, August 17, 2012

Cupcake Wishes

Who does not love Cupcakes??? Tiny little cake pieces with some delicious frosting on it (YUMM...want one now!!) So here is a Birthday card with little cupcakes on it.


I love this Stamp set and coordinating Cupcake builder punch from Stampin' Up! This polka dot background stamp is awesome too...perfect background for this card. I stamped the images and heat embossed the sprinkles (they are sprinkles... bright and attractive :D)


That sentiment goes perfect with the theme of the card. Punching out the cupcakes is so much easier than snipping them manually. I remember using this stamp and punch first time.... it is for a friend whom we send cupcakes for her birthday every year. The stamp set had arrive at the right time (just before her birthday).

That is all for now,

Until next time,

Happy Krafting,

Cheers =) 


Thursday, August 16, 2012

Birthday Bouquet

As I always say... Birthdays are fun and cheery, so the birthday cards should be the same. I tried to make today's card fun and bright... while also trying to keep it elegant (maybe elegant is not the word...but since I can't think of the right word... lets keep elegant).


On this card I've triple stamped the image and heat embossed it with clear powder. This is a technique I had learned from Chic n Scratch-Fabulous Florets  ...long time ago and have made 2 cards using this method.  Of course my first try looked similar to hers..same crumb cake and very vanilla cardstock. Stamping this pretty simple....ink the image (from Fabulous Floret set) with the color of your choice...stamp it once in the middle...then without re-inking and picking it up, rotate the top to your right and stamp. Do that one more time on the left. Pretty simple...and looks absolutely gorgeous with big images. 

I do another step of heat embossing it. So once I stamp the image, I ink my stamp with Versamark Ink and stamp over the ink stamped image. With big images it is pretty easy to do (haven't tried it with small images). Then I used clear embossing powder and heat embossed it.

So go ahead, and try this technique ;)

That is all for now,

Until next time,

Happy Krafting,

Cheers =)

Wednesday, August 15, 2012

Happy I Do Day

Weddings are always fun and happy times. There is the happy couple, the family members, vows, ring exchange, music, dance, cake and what not. Of course the couple are center of attention... it is their day!! Happy couple are also center of attention of my card for today.


The wedding couple is 1 stamp which I found years ago (lets say 5-1/2 years approx)...when I had just started collecting stamps and had gotten into making cards for friends and family. I have always like this stamped... now the bride and the groom don't have smiles on the stamp..i make my own...it is their happy day...so they have to have a wide smile on their face :D

The embossed swirly background, embossed hearts and pearls add perfect touch to this card.... looks all wedding-y ;)

That is all for now...

Until next time,

Happy Krafting,

Cheers =)

Tuesday, August 14, 2012

Welcome Little One

Continuing with my card making for the boutique.... I made this welcome baby card...again this is not gender specific, a neutral card to wish congrats to the new parents. But it is super cute I think ;)


I wanted to use this stamp set Little Additions, it had this crib.....as soon as I stamped it I knew cutting it out would be the best....only if it had a die cut to go along with it, would have been perfect ;) Never the less, I did cut it out by hand (it is a handmade card-some imperfections are must :D).  The crib by itself looked lonely... so I used the baby head from other stamp set Baby Bundle. It turned out sooo cute. The sentiment is from a baby stamp set I purchased from Michaels (sorry can't rem the company name)

A closer look at the baby and the crib :D

Isn't that super cute???? I knooow!!!

That is all for me from now!

Until next time,

Happy Krafting,

Cheers =) 

Monday, August 13, 2012

Elegant Birthday

When I think of Birthday's I always think of fun and bright colors. So most of the birthday cards I make are bright and fun. But there are some who like Elegant looking cards....see for me elegant goes with Thank you cards or Wedding cards. But everyone has their choice. So I had ordered this background...flourish kind..and thought of using it to make a card. The print looked elegant... so my Birthday card turned out the same:

Yes it is simple and elegant.. so unlike the birthday cards I make... but I still like how it turned out...I don't know if its the color or the print or all of it that makes it look nice. I do love the More Mustard and Rich Razzleberry cardstock with the Crumb Cake CS. Infact I even layered the Crumb cake ribbon with Rich Razzleberry ribbon ( I looove ribbons...can't you tell :D) 

I did heat emboss the print on Rich razzleberry CS and also made holes on the scallop circle. The holes added to the look of the card I think. Who knew I could make elegnat birthday cards ;)

That is all for now,

Until Next time,

Happy Krafting

Cheers =)